Building your first connector
Last update: 28.04.2022
Let’s build a custom connector for salesforce with our SDK. Please note that APIFuse has a prebuilt Salesforce connector but in this example, we will show you how to build a Salesforce connector leveraging our SDK one trigger and an action.
Navigate to the “SDK” section and click on the “Add Connector” button to create the new custom connector. You will be taken to a blank connector page. Go ahead and add the connector names & logos. As you add relevant details you can preview your changes on the right-hand side.
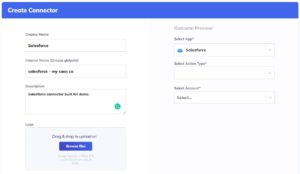
Connector Display Details:
- Connector/App Display Name (Connector Name shown to your Users) – In our case, we can name it simply “Salesforce”
- Connector/App unique name (it can be anything but should be unique globally) – “salesforce – my saas co”
- Connector/App Logo – png/jpeg with 1:1 size.
Connector Authentication:
Different applications use different authentication mechanisms. Depending upon how you need the authentication information from your users, we have categorized the authentication mechanism into three.
- OAuth – Your users will be redirected to the connector application (Salesforce) and APIFuse will handle all the redirect and token generation. The Access Token & Refresh Token will be made available for you through our SDK to access the API (Salesforce API)
- Basic Authentication – Users will provide a username/password in the APIFuse authentication screen which will be made available for you through our SDK to access the API
- Custom Authentication – You can define any inputs that you need from your users in order to complete the authentication.
In our case, Salesforce uses OAuth 2.0 authentication mechanism (more info here). You will need the below information to proceed with OAuth 2.0.
- Salesforce Client Id
- Salesforce Client Secret
- OAuth Scopes (Depends on the data you need from Salesforce)
- Authorization URL (for salesforce: https://login.salesforce.com/services/oauth2/authorize)
- Token Url (for salesforce: https://login.salesforce.com/services/oauth2/token)
- Response Type (only code type is supported at the moment).
Please note when you register the OAuth app with salesforce you need to provide https://api.apifuse.io/connection/callback as your redirect URL.
Navigate to the authentication section
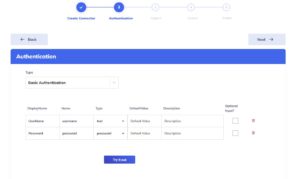
Select OAuth2 from the Type dropdown and fill in the OAuth details we discussed above.
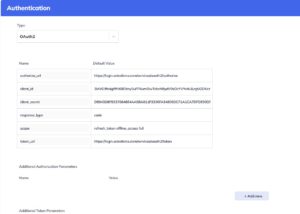
Some applications may need additional OAuth parameters to pass in authorization & token requests. If required, you have the option to define those parameters as well.
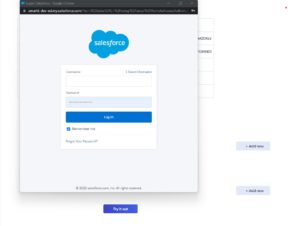
Once you add all the Oauth details, click on the “Try it out” button at the bottom of the page. This will launch the authentication screen. This way you can verify the OAuth setup and create a test connection (authentication for testing triggers & actions).
Triggers
We will build a trigger to fetch the contact objects from salesforce ie whenever a contact is created or updated in Salesforce, the workflow will be triggered with the corresponding contact object.
APIFuse supports both polling and webhook triggers, i.e. you call to poll the APIs based on date range and fetch the records from Salesforce or you can use webhook to receive the data from the source system. In this case, we will use a polling trigger.
Navigate to the trigger section: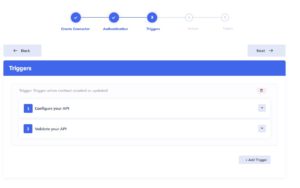
By default, one trigger is added for you. You can add any number of additional triggers.
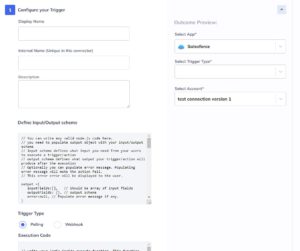
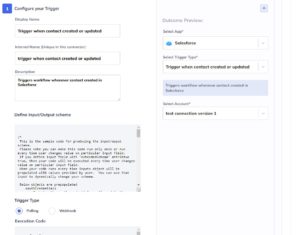
We need the following information to configure the trigger.
- Display Name (Trigger name shown to your users)
- Internal Name (Unique identifier within your app)
- Description (Useful information for your users to help them set up the trigger when building workflows)
- Input/Output Schema (Programmatically define your input/output schema so that APIFuse can interact with your code and get the necessary inputs from your users)
- Trigger Type (polling/webhook)
- Execution Code (Actual code that will run once the workflow is published)
Input/Output schema
Understanding the input/output schema is crucial in building custom connectors. Input schema defines what your connector needs from the user to perform its action. Let’s say you are building a trigger for Google Sheets, in this case, you would need the drive, the workbook and the file information to make an API call to Google Sheets. So you would need your user to input these values when setting up the workflow.
The output schema will be used by APIFuse to help your users map the output fields from your trigger/actions to other actions as inputs.
APIFuse provides a programmatic approach to defining your input/output schema. You can dynamically change the inputs/output shown to the user based on user input. For example, in our salesforce case, salesforce objects can have custom fields ie output schema for the different organizations will be different for salesforce objects. So you need to produce a different output schema based on the authenticated user.
You can write any valid node.js code for defining the input/output schema. APIFuse will expect a javascript object called “output” populated with the below fields.
- inputFields: array of input field definitions
- outputFields: Schema object
- error: Optional String field for letting the user know any error occurred during construction of the schema (which gets displayed in our workflow builder UI as an error to the end user).
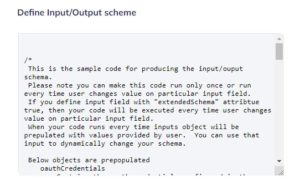
Let’s get back to our salesforce trigger for contact objects. In this case, we don’t need any user inputs, we just need to define the output schema. As we explained before, Salesforce objects don’t have a fixed schema so we need to retrieve the object fields using the Salesforce object Describe api
curl https://MyDomainName.my.salesforce.com/services/data/v54.0/sobjects/Account/describe/ -H “Authorization: Bearer token”
From the Describe API response, we need to construct the output schema for our trigger. The sample code is given below.
/*
 This is the sample code for producing the input/output schema.
 Please note you can make this code run only once or run every time, user changes the value on the particular input field.
 If you define the input field with "extendedSchema" attribute true, then your code will be executed every time, the user changes the value on the particular input field.
 When your code runs every time, the “inputs” object will be populated with values provided by the user.  You can use that input to dynamically change your schema.
 Below objects are pre-populated
    oauthCredentials
        Contains the OAuth credentials configured in the authentication section
    connectionData
        Contains user authentication details. If you configured basic authentication, this object will contain a username and password.
        If you configured OAuth, this object will contain the response returned by Oauth Token API. Usually, this object contains access_token, refresh_token, etc.
        If you configured custom authentication, this object will contain the values for the user inputs defined in the authentication section.
    inputs
        Contains runtime input values provided by the user while setting up the workflow
*/

// Do not declare a new variable for “output”. Just populate the output object with required inputFeilds and outputFields
output = {};

//Defining function to refresh salesforce access token
async function refreshAccessToken() {
    let params = {
        grant_type: 'refresh_token',
        client_id:  oauthCredentials.client_id, // oauthCredentials object is prepulated for you if you configure OAuth in authentication section
        client_secret:  oauthCredentials.client_secret,
        refresh_token: connectionData.refresh_token // connectionData object is prepulated with the token response returned by salesforce
    }
    let data = querystring.stringify(params)
    return axios({
        url: oauthCredentials.token_url,
        method: 'post',
        data: data,
        headers: { 'Content-Type': 'application/x-www-form-urlencoded' },
    })
}

//Defining function to get contact object fields
async function getContactObjectFields(accessToken) {
    return axios({
        url: `${connectionData.instance_url}/services/data/v48.0/sobjects/Contact/describe`,
        method: 'get',
        headers: {
            'Authorization': 'Bearer ' + accessToken
        }
    })
}

async function process() {
    let inputFields = [];
    let outputFields = {};
    let tokenRs = await refreshAccessToken();
    let describeRs = await getContactObjectFields(tokenRs.data.access_token);
    let objectDef = {
        name: inputs.object,
        displayName: inputs.object,
        type: 'OBJECT',
        value: {}
    }
    if (describeRs.data && describeRs.data.fields) {
        describeRs.data.fields.map(rec => {
            objectDef.value[rec.name] = {
                name: rec.name,
                displayName: rec.label,
                type: 'TEXT',
                value: ''
            }
            if (rec.type === 'boolean') {
                objectDef.value[rec.name].type = 'BOOLEAN';
                objectDef.value[rec.name].value = true;
            }
        })
    }
    outputFields['contact'] = objectDef;
    output.inputFields = inputFields;
    output.outputFields = outputFields;
}
// calling the function we defined above to produce the input output schema
process();
The above code will produce an output like in the below example. From this output, APIFuse will understand that the trigger is going to produce an output object called “Contact” and the contact will have AccountId, Email, Id, and Firstname text fields.
{
    "inputFields": [],
    "outputFields":{
        "Contact": {
          "type": "OBJECT",
          "name": "Contact",
          "displayName": "Contact",
          "value": {
            "AccountId": {
              "name": "AccountId",
              "displayName": "Account ID",
              "type": "TEXT",
              "value": ""
            },
            "Email": {
              "name": "Email",
              "displayName": "Email",
              "type": "TEXT",
              "value": ""
            },
            "Id": {
              "name": "Id",
              "displayName": "Contact ID",
              "type": "TEXT",
              "value": ""
            },
            "FirstName": {
              "name": "FirstName",
              "displayName": "First Name",
              "type": "TEXT",
              "value": ""
            },
          }
        }
      },
    "error": null
}
As you make changes in the code, your code will be executed and the corresponding input fields will be shown in the preview section. Our trigger doesn’t need any inputs hence we are returning an empty array. When we build action, we will include input as well.
Let’s look at our code. It’s just regular node.js code that populates the output object with inputFields,outputFields, and error. We have used the below context objects that are prepopulated with your OAuth configs, user connection data, and inputs. These will help us construct the input output schema dynamically.
- oauthCredentials
-
- This object contains the client id/secret and other OAuth details you configured in the authentication section.
- You can use this object to refresh the salesforce access token.
- connectionData
-
- This object contains user authentication data. The data depends on the authentication type configured “Authentication” section
- OAuth 2 – connectionData object will contain the Token API response ie access_token, refresh_token, and any additional data returned by token API. In our case, Salesforce token API returns access_token, refresh_token, and instance_url. We will use instance_url to make the API call to “SObject Describe” API
- Basic Authentication – connectionData object will contain username & password fields with the values provided by your users.
- Custom Authentication – connectionData object will contain the inputs you defined in the Authentication section with the values entered by users.
- inputs
-
- This object contains values for your input fields when your user is configuring the workflow. Sometimes you may need input from the user for building out the output schema or additional input schema. In those cases, you can utilize the inputs field.
- If you take the Google Sheets connector, to construct the output schema we would need to know the spreadsheet file id, drive id, book id. To fetch book ids you need to know the spreadsheet id and to fetch spreadsheet ids you need to know drive id. To achieve this, you can write the following code.
output = {}
output.inputFields = [
        {
            "name": "drive",
            "displayName": "Google Drive",
            "description": "Select your Google Drive",
            "controlType": "select",
            "extendedSchema": "true",
            "type": "TEXT",
            "templatable":true,
            "required":true,
            "fieldGroup":"GSheetFile",
            "dynamic": "true",
            "picklistValue": null,
            "pickList": "goole_drives_picklist", // more info provided in reference section
            "linkedPickList": {}
        }
]

if(inputs.drive){
    output.inputFields.push({
            "name": "spreadsheetId",
            "displayName": "Spreadsheet file",
            "description": "Select Spreadsheet file",
            "controlType": "select",
            "extendedSchema": "true",
            "type": "TEXT",
            "templatable":true,
            "required":true,
            "fieldGroup":"GSheetFile",
            "dynamic": "true",
            "picklistValue": null,
            "pickList": "spreadsheet_picklist"
    })

    if(inputs.spreadsheetId){
        output.inputFields.push({
             "name": "sheet",
            "displayName": "Sheet",
            "description": "Select Sheet",
            "controlType": "select",
            "extendedSchema": "true",
            "type": "TEXT",
            "templatable":true,
            "required":true,
            "fieldGroup":"GSheetFile",
            "dynamic": "true",
            "picklistValue": pickListValue,
            "pickList": "",
            "linkedPickList": {}
        })

        if(inputs.sheet){
            output.outputFields = {} // Build schema using sheet data
        }
    }
}
- As you can see, when the code runs the first time, it will return only the drive. Once the user inputs the drive your code will run again, this time the inputs.drive field would be populated with the drive id inputted by the user and the code will add the spreadsheet input definition to the inputFields array. The user workflow builder will be refreshed with new input fields ie the user now will see an additional spreadsheet dropdown. Similarly, you can manipulate the input/output schema dynamically based on different conditions and user input
Now that we defined the input/output schema. Let’s move on to one final piece for setting up the trigger. We just need to write execution code.
Execution Code
Execution runs once the workflow is published. Depending upon the trigger or action, the execution code will work slightly differently. Either way, you should have an execute (input, context) function that returns a promise with the output object as shown below.
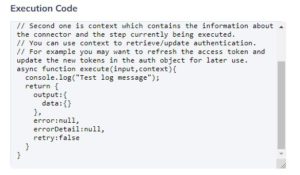
The execute function takes two parameters i.e. input & context. The input object contains the input fields you defined in the input/output schema in the previous section with the run time values populated. The context object contains additional helper functions required for you to complete the execution like user authentication, OAuth credentials, etc. The execute function should return a Promise that resolves with the below object.
/*
  output as shown below could be either array or object. For the trigger, it will be mostly arrays.
  Items inside the array should correspond to the output schema defined in input/output definition.
  For each item you return, the APIFuse processor will trigger a job that executes the complete workflow separately.
*/
let o = {
  output:{} | [], //
  error:null, // String , Short error message
  errorDetail:null, // String. Detailed error message
  retry:false, // Boolean, if true, APIFuse will try to rerun the step. This will be useful incase of network errors.
}
Let’s write the execution code for our trigger. So we are going to use Salesforce SOQL api to get the contacts that are created/updated in the specified time range. The API call would look like the example below.
curl https://MyDomainName.my.salesforce.com//services/data/v50.0/query?q= SELECT Id,FirstName,AccountId,Email FROM Contact WHERE LastModifiedDate 2021-04-04T01:01:01Z > amd LastModifiedDate < 2021-04-04T02:01:01Z-H "Authorization: Bearer token"
To make this API call, we need the access token, last polled date time, and current date-time. You can use the context object to get the user authentication & last polled date time.
async function refreshAccessToken(oauthCredentials,connectionData) {
    let params = {
        grant_type: 'refresh_token',
        client_id:  oauthCredentials.client_id,
        client_secret:  oauthCredentials.client_secret,
        refresh_token: connectionData.refresh_token
    }
    let data = querystring.stringify(params)
    return axios({
        url: oauthCredentials.token_url,
        method: 'post',
        data: data,
        headers: { 'Content-Type': 'application/x-www-form-urlencoded' },
    })
}

async function getContacts(connectionData,from,to){
    return axios({
        url: `https://${connectionData.instance_url}/services/data/v50.0/query`,
        responseType: 'json',
        params:{
            q:`q= SELECT Id,FirstName,AccountId,Email FROM Contact WHERE LastModifiedDate > ${from} and LastModifiedDate < ${to}`
        },
        headers: { Authorization: 'Bearer ' + connectionData.access_token },
        method: 'GET',
    })
}

function formatDate(ms){
    let d = new Date()
    d.setTime(ms);
    return `${d.getFullYear()}-${(d.getMonth()+1).padStart(2,'0')}-${d.getDate().padStart(2,'0')}T${d.getHours().padStart(2,'0')}:${d.getMinutes().padStart(2,'0')}:${d.getSeconds().padStart(2,'0')}Z`
}

// This function will be invoked by the processor.
async function execute(input,context){
    // Fetches the OAuth credentials you configured in Authenticaiton section
    let oauthCredentials = await context.getConnectorCredentials();
    // Fetches the user authentication data
    let connectionData = await context.getAuthentication();
    // Fetches last committed date time
    let LastModifiedDate = await context.getLastPolledDateTime();

    let tokenRs = await refreshAccessToken(oauthCredentials,connectionData);

    let currentDate = Date.now().getTime();
    let fromDate = formatDate(LastModifiedDate)
    let toDate  = formatDate(currentDate)

    connectionData.access_token = tokenRs.data.access_token;

    let recordRs = await getContacts(connectionData,fromDate,toDate);

    // formatting data to match the trigger schema we defined in the input/output section
    let contacts = recordRs.data.records.map(r=>{
        return {
            Contact:r
        }
    })

    // at last lets commit the out poll time. So that we can use it in the next poll
    // In case of error in previous steps don't commit the poll time as you may miss some records
    await context.updateLastPolledDateTime(currentDate)

  return {
    output:contacts,
    error:null,
    errorDetail:null,
    retry:false
  }
}
That’s it, our trigger is ready. Now let’s create our first action.
Actions
Building actions are exactly the same as building triggers. You need to define the input/output schema and add the execution code.
We will build an action to create contacts in Salesforce. We will use the SObject api to create the contact record in salesforce. Salesforce API documentation to create an object is available here
Navigate to the action section and configure the action as shown below.
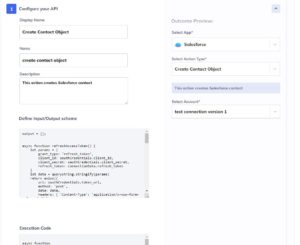
Let’s define our input/out schema. Please read the input/output schema section explained in the trigger before you proceed.
As explained in the trigger section, the Salesforce contact object doesn’t have a fixed schema we need to get the object fields from the Describe API and then construct the input/output schema from the Describe API response.
/*
 This is the sample code for producing the input/output schema.
 Please note you can make this code run only once or run every time user changes value on particular input field.
 If you define input field with "extendedSchema" attribtue true, then your code will be executed every time user changes value on particular input field.
 When your code runs every time inputs object will be prepulated with values provided by user.  You can use that input to dynamically change your schema.

 Below objects are prepopulated
    oauthCredentials
        Contains the oauth credentials configured in the authentication section
    connectionData
        Contains user authentication details. If you configured basic authentication, this object will contain username and password.
        If you configured oauth, this object will contain the response returned by Oauth Token API. Usually this objects contains access_token, refresh_token etc.
        If you configured custom authentication, this object will contain the values for the user inputs defined in the authentication section.
    inputs
        Contains runtime input values provided by user while setting up the workflow
*/

// Do not declare new variable for output. Just populate the output object with required inputFeilds and outputFields
output = {};

async function refreshAccessToken() {
    let params = {
        grant_type: 'refresh_token',
        client_id: oauthCredentials.client_id,
        client_secret: oauthCredentials.client_secret,
        refresh_token: connectionData.refresh_token
    }
    let data = querystring.stringify(params)
    return axios({
        url: oauthCredentials.token_url,
        method: 'post',
        data: data,
        headers: { 'Content-Type': 'application/x-www-form-urlencoded' },
    })
}

async function getObjectDescribe(objectName, accessToken) {
    return axios({
        url: `${connectionData.instance_url}/services/data/v48.0/sobjects/${objectName}/describe`,
        method: 'get',
        headers: {
            'Authorization': 'Bearer ' + accessToken
        }
    })
}

async function process() {
    let tokenRs =await refreshAccessToken();
    let outputFields = {}
    let describeRs = await getObjectDescribe(inputs.object, tokenRs.data.access_token);
    let objectDef = {
        name: 'Contact',
        displayName: 'Contact',
        type: 'OBJECT',
        value: {}
    }

    if (inputs && inputs.object) {
        if (describeRs.data && describeRs.data.fields) {
            describeRs.data.fields.map(rec => {
                if (!rec.calculated && (rec.createable || rec.updateable) && !rec.defaultedOnCreate) {
                    objectDef.value[rec.name] = {
                        name: rec.name,
                        displayName: rec.label,
                        type: 'TEXT',
                        value: '',
                        required: !rec.nillable
                    }
                    if (rec.type === 'boolean') {
                        objectDef.value[rec.name].type = 'BOOLEAN';
                        objectDef.value[rec.name].value = true;
                    }
                }
            })
        }
        inputFields.push(objectDef);
        outputFields["sObjectId"] = {
            type: 'TEXT',
            name: 'sObjectId',
            displayName: 'Created Record Id',
            value: ''
        }
    }

    output.inputFields = inputFields;
    output.outputFields = outputFields;
}

process();
Execution Code
The execution code is the same as the trigger execution code except the business logic. We will create function called execution(input,context) that returns a promise
async function refreshAccessToken(oauthCredentials,connectionData) {
    let params = {
        grant_type: 'refresh_token',
        client_id:  oauthCredentials.client_id,
        client_secret:  oauthCredentials.client_secret,
        refresh_token: connectionData.refresh_token
    }
    let data = (new URLSearchParams(params)).toString();
    return axios({
        url: oauthCredentials.token_url,
        method: 'post',
        data: data,
        headers: { 'Content-Type': 'application/x-www-form-urlencoded' },
    })
}

async function createContact(connectionData,data){
    return axios({
        url: `https://${connectionData.instance_url}/services/data/v54.0/sobjects/Contact`,
        responseType: 'json',
        data,
        headers: { Authorization: 'Bearer ' + connectionData.access_token },
        method: 'POST',
    })
}

// entry point for your code
async function execute(input,context){
    // Fetches the OAuth credentials you configured in Authenticaiton section
    let oauthCredentials = await context.getConnectorCredentials();
    // Fetches the user authentication data
    let connectionData = await context.getAuthentication();
    let tokenRs = await refreshAccessToken(oauthCredentials,connectionData);
    connectionData.access_token = tokenRs.data.access_token;
    let recordRs = await createContact(connectionData,input);
    // formatting data to match the action schema we defined in the input/output section
    let contact = {
        sObjectId: recordRs.data.id,
    }
  return {
    output:contact,
    error:null,
    errorDetail:null,
    retry:false
  }
}
We have created our trigger and action. We just need to publish it so that our users can start using our new custom connector.
Publish your custom connector
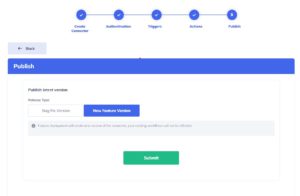
Finally, we just need to publish our custom connector. You have two options for publishing the custom connector. One we can publish a brand new version or we can overwrite the existing version. Publishing a new version means if your users are already using an older version of your connector they will not be impacted by the new release. But if they create a new workflow or edit the old workflow they will be automatically updated to your latest connector version. Another option is to publish a bug-fix version that will overwrite your existing version and will impact all your customers. This option is useful when you want to release a patch to your custom connector.
For the first time publishing a connector, only the new release version is enabled. Click on the submit button and your connector is ready for use.
Once published, you can navigate to the build section and create a new workflow. You should see the custom connector you created in the apps dropdown. Now you can use it like any other connector within the APIFuse library.
